

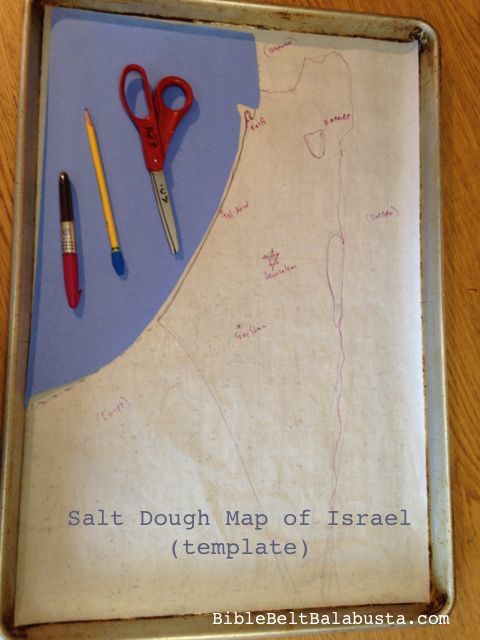
map o’ melach
In honor of Yom Ha’atzmaut this year, 2nd and 3rd graders collaborated on a salt dough map of Israel. We did this as a hands-on introduction to Israel’s topography, place names and its location as regards the rest of the world. Salt dough is cheap, fast, messy and, barring any sensory processing issues, super-fun to play with. Salt dough maps are an oldie but a goodie, and need no cooking, no baking.
Kids looked at wall maps, relief maps, a globe, a world map and photographs to get visual impressions, and then had to build and sculpt a 3-D version within a large pan. Our topographical details were not precisely “to scale,” but as long as Mt. Hermon was the highest point and the Dead Sea was the lowest, it didn’t matter. What mattered was that everyone work together to convert pictures into a tactile representation. Other jobs included mixing colors (for neighboring countries) and creating signs on toothpick posts.
oversized jellyroll pan with silicone / parchment liner
The map was complete after two consecutive 30 min. classes, and then I whisked it upstairs to our Yom Ha’atzmaut program. It joined our Art display next to Kitah Aleph’s Giant Paper Mosaic Map. The kids enjoyed collaborating to produce something big and funky to show to the rest of the school.
extra flour can prevent this level of stickiness
Materials:
- Salt dough (premixed or to mix with kids): Equal parts salt and flour, plus “enough” water. No cooking.
- Extra flour if the dough gets too sticky
- Baking pan (we used an industrial size jelly roll pan) (but lots of folks build onto corrugated cardboard, see Notes below)
- Parchment / Silicone paper liner to draw template upon
- Tape: to secure liner to to pan or it will shift during use
- Blue paint for water
- Brushes
- Paint for neighboring countries (to mix in bowls before adding to map)
- Index cards to cut signage
- Scissors
- Toothpicks as signholders (and more tape)
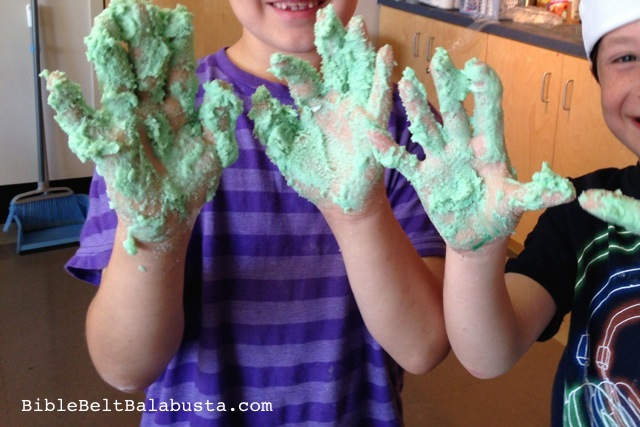
Neighboring countries are dough the kids dyed in bowls before pressing into place. This is in contrast to the blue bodies of water, which we did not dye beforehand. We created the depressions for the Dead Sea, Kinneret and Mediterranean Sea and then brushed each one with blue tempera paint. Why? I wanted to keep all water blue and to paint them directly to make them more memorable as geographic anchors. Note we forgot the Jordan River. Next time…
Another salt dough map technique is to build everything without color, let the whole thing dry, and then paint. But for this quick project, I wanted to be sure the kids knew what they were building while they were building, so we opted to color-code as we went. I used blue paper to represent the Mediterranean Sea when the kids first saw the template. This helped them get their bearings as they starting building.
The best part of the project was the conversation along the way. We marveled at how tiny Israel was; we noticed it was at a cross-roads of Europe, Asia, and Africa; and we saw who its neighbors were. We talked about how ancient Eretz Yisrael was, but how the State of Israel is only 66 years old. I loved that the kids moved amongst the different kinds of maps, pointing, comparing, and asking questions: Where’s the Red Sea? Where’s Mt. Sinai? Where’s the Dead Sea and why is it dead? Etc.
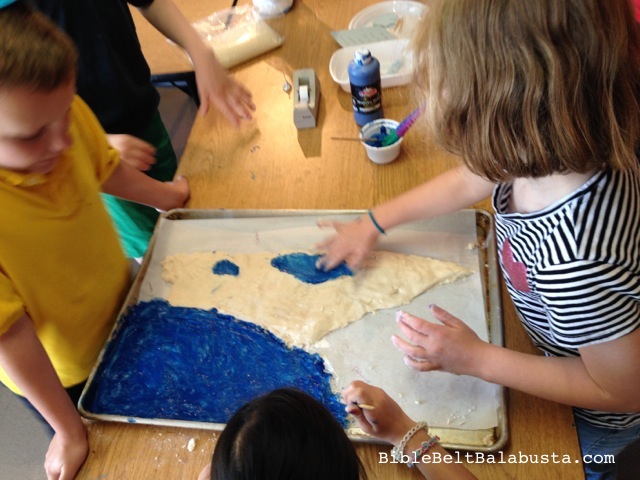
smooshing blue paint into the Dead Sea
The map dried beautifully, and I’ll try to store it to show next year’s class.
P.S. The Dead Sea is always a fascinating topic for kids. Anticipating this, I’d brought some super-saturated salt water and a golf ball to show how salt affects buoyancy. Dead Sea water is about 33% salt, so I melted one part salt in three parts water. A golf ball will sink in a jar of fresh water, but float in a jar of our Dead Sea-esque water.
NOTES:
Allergies: My kids did not have gluten issues, so we used the usual white flour in the salt dough. Hopefully, there are GF versions online if you need them. Let me know if you find one that works well.
Salt Dough: My co-teacher Erin mixed the dough at home and brought it in ziploc bags, because we knew we wouldn’t have time to let the kids make it. Ideally, you’ll have time. Salt dough is a forgiving recipe, so even a toddler can’t mess it up. The only trick is to add a smidge of water at a time, so you don’t end up with sloppity gloop. Or gloopity slop.
So many salt dough maps online. The most popular versions use pieces of old corrugated cardboard boxes as substrates. Look at these gorgeous examples from Kid World Citizen, from Squidoo, and from older kids at Ginger Snap Shots. I didn’t see Jewish maps of Israel (only Christian-based, which document some features that aren’t in our curriculum), but if you know of any, holler and I will add links here.
Sensory issues: Our dough got too sticky during it’s journey from home to school, but the addition of flour helped a lot. Ideally, it is more like play dough than like mud. Still, the consistency might be too much for a child with sensory issues. Make sure there are other jobs that child can do without feeling left out: making signs, checking facts, creating a list of place names to add, creating something crucial for the display, etc.
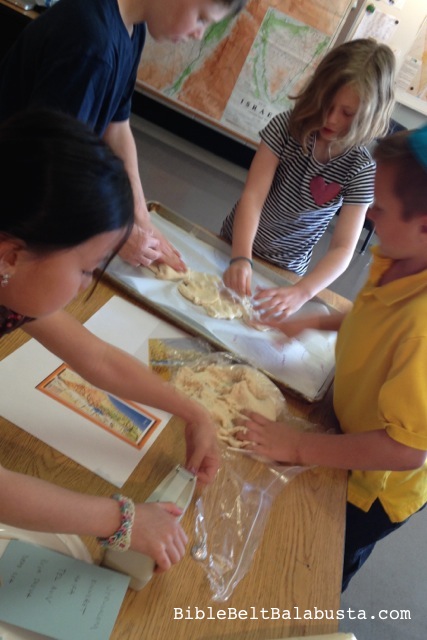
reference maps are on wall, board and tables


This has inspired me to do a map like this with my kids for homeschool this year. I may even incorporate something like this in our kids’ club at church! Thank you for sharing your fun activity!
I’d love to see a picture! Thanks for letting me know.
sorry for my ignorance, what is the difference between a Jewish map of Israel and a Christian one?
Have you found the Jewish one? I’ll be doing this soon with my kids to study Israel. I’d prefer to highlight our Jewish faith. Thank you.
What I meant was: when I was planning my Jewish map (made in a synagogue art class), I looked online for posts about making a salt-dough map of the land of Israel. Most sources were Christian and they focused, understandably, on labeling places important to their own curriculum. Some of these places are important to a Jewish curriculum, but some are not. And place names can be different, too: “Sea of Galilee” vs. “Kinneret,” for example. So, places, place names and vocab can be very different: all depending on what is being studied at the time.