
quick, cheap DIY
What if you want kids to make Havdalah candles and you don’t have the time and materials (or inclination) for nice, beeswax versions? I’m the first to admit that candles from scratch can be a big to-do—even just the simple, rolled sheets.
Rejoice: all you really need are leftover Hanukkah candles, a bowl and a teakettle.
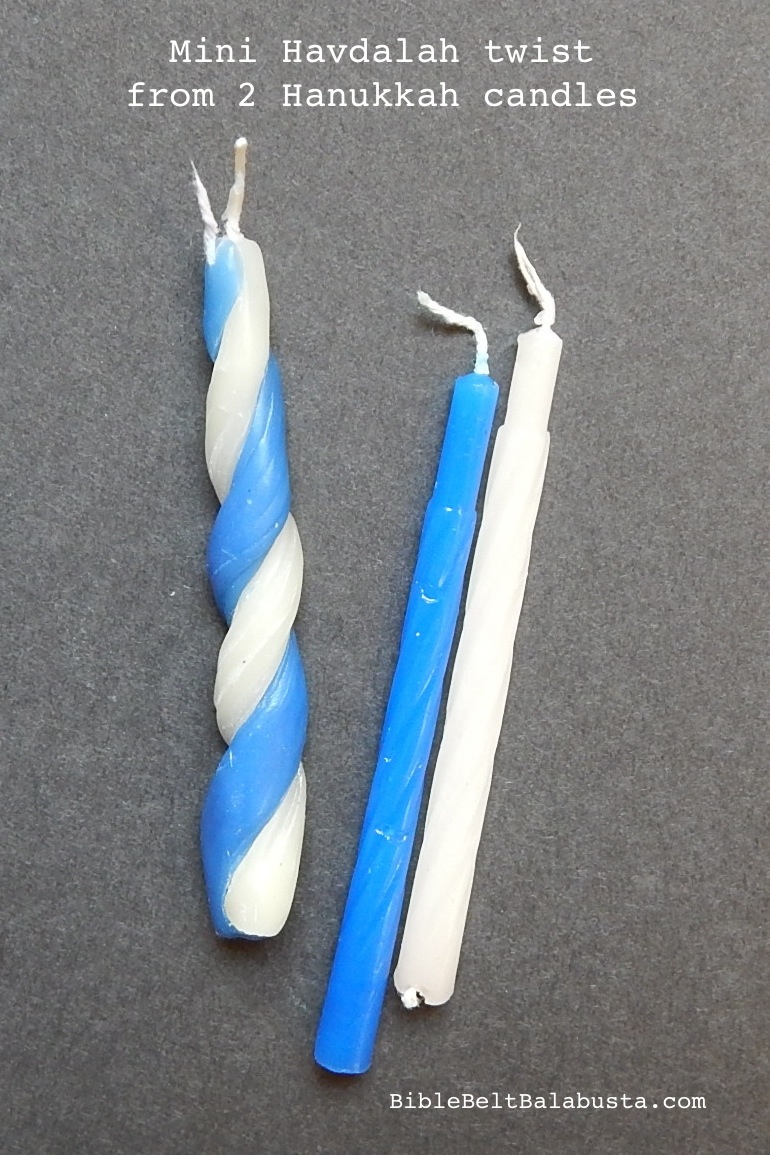
Just twist two warmed Hanukkah candles to create one mini Havdalah candle. It’s an easy, cheap DIY that can make any Havdalah lesson hands-on and memorable.
Two wicks are the kosher minimum (the reason why makes for another cool lesson: see my Havdalah Intro post). To braid three Hanukkah candles is possible, but I wouldn’t recommend trying it with kids (see below).

mine
HOW: What is intuitive to you and me might be weird to a kid. Kids seem to need instruction and time to experiment with this project. It isn’t every day they get to work with a material whose pliability waxes and wanes depending on minute changes in temperature.
First, tell your kids to be slow and gentle. Keep warming the candles when they get too brittle. You can re-warm the same candles all day. No rush. (Expect some breakage, but most cracks and outright fractures can “heal” when smoothed in the hot water.)
If your table is cold, put a thin towel or handkerchief down as a work surface. It cushions and insulates the wax as it cools and helps prevents cracking.
Below is the technique my First Grader came up with.
First, find some Hanukkah candles and a bowl bigger than the candles, and then heat some water in a teakettle.
- Pick two candles in contrasting colors.
- Pour hot water in bowl and add the candles. I aim for a temp that I can bear to touch.
- Wait for the candles to soften. (30 seconds to 2 minutes, usually, depending on temperature)
- When a candle “gives” with a gentle squeeze, remove both candles from water.
- Line up candles flat on the table and press the bases together.
- Gently pick up Color A and smoosh it over the base of Color B, like an “X.” Then, gently smoosh B over A, then A over B, working your way up to the tip, pressing the pieces together. The candles are still resting on the tabletop for support.
When the candles start to crack, warm them again. Add hot water to the bowl as needed.
Once the candles have about 3 twists, kids can stop. Done.
For prettier versions, older kids and adults can keep going:
- Re-warm the twist, pick it up and continue to twist the whole thing in your hands (not flat on the table), again working up from the bottom.
This extra step is one reason my own examples look slightly different from my First-Grader’s examples. I did the in-the-hand twisting, and he didn’t. Both work fine.
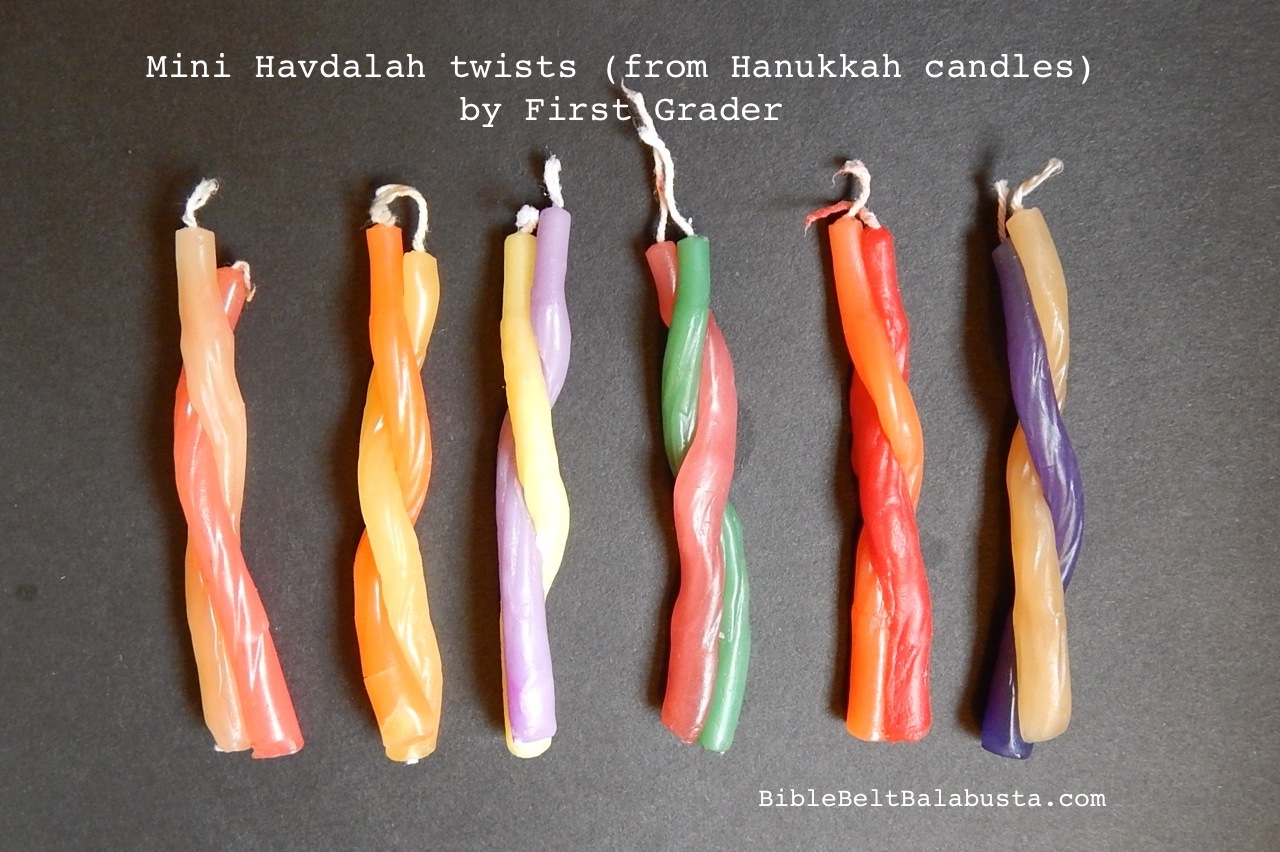
his
NITTY GRITTY:
BOWL: Use something you don’t mind cleaning the wax out of later. It’s a pain to scour wax out of a food dish, and you probably don’t want petroleum-based wax residue on anything you cook with. I re-use disposable plastic dishes from a Chinese take-away.
TEMPERATURE: Some kids freak out when asked to put their hands in hot water and who can blame them? Tweak your own system to make it as safe and comfortable as possible.
Water is too hot—period—if the colors start floating off of the candles.
TONGS: use these if you are in favor of keeping the water super hot (to soften candles quickly), and if you don’t plan on kids using it. Tongs transfer hot candles to the work table.
SAFETY: Don’t add hot water to a bowl while a child’s fingers are anywhere near the bowl. Those fingers are too unpredictable.
BRAIDING THREE CANDLES: Of course we all want three candles instead of just two. But, to braid three Hanukkah candles into one Havdalah candle requires far more dexterity and far hotter water. Even I burn my fingers with three, and because the water has to stay so hot (to sustain wax pliability), the wax itself starts to look rather shabby. With kids, I’d stick to the two candle twist. If teenagers want to try three, great, let them.

kinda difficult and not really worth it
LINKS:
1) See my three other posts about the whys and hows of making “real” Havdalah candles with kids: my Intro with options, and then details about rolled beeswax candles and dipped beeswax candles.
2) Smart teachers at Temple Beth El (Austin, TX) figured the Hanukkah-candles/Havdalah-candle-thing all on their own. Here’s the link wherein they share their trials and successes (and in-progress photos). Note the neat touch of adding drips of wax from a lit candle: the drips add color and help fuse the twists/braids.
3) Or try this post from Juggling Frogs, wherein a true balabusta has a system for creating blue and white Havdalah minis for travel and for out-of-town guests.
4) For other Havdalah links, scroll to the bottom of my Havdalah Candle Intro post.
I’d love to hear about any of your own efforts with this stuff. Please leave a comment below.


I LOVE that you have a link to Juggling Frogs! For readers who may not be familiar with the genius that was Carolyn’s blog, here’s a link to her not-to-be-missed toy shul
http://blog.jugglingfrogs.com/2007/07/camp-mommy-rebuilding-beit-medrash.html
Juggling Frogs is an amazing resource. Thanks for the reminder about her toy shul, especially because I’d forgotten about that teeny menorah made from pony beads. I absolutely must make that for our Playmobil folk.
Lynne, you are one attentive reader!
Pingback: Making Rolled Beeswax Candles for Havdalah | Bible Belt Balabusta
Pingback: Making Havdalah Candles with kids | Bible Belt Balabusta