

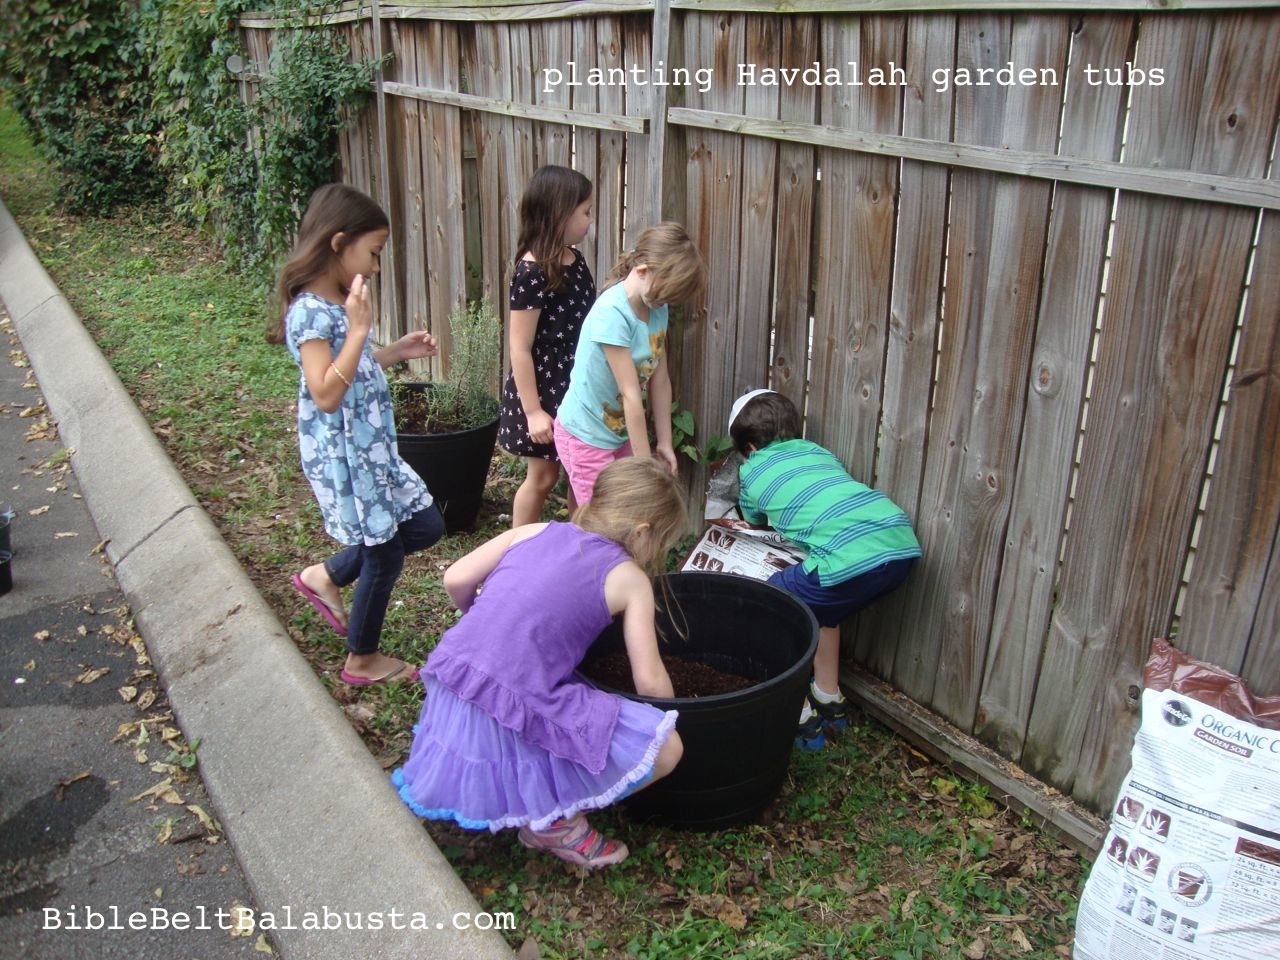
fresh, Fall planting
Havdalah is a lovely, quick, slightly spooky service that marks the distinction between the end of Shabbat and the beginning of the work week. Each Saturday night morphs from Sacred Time to Ordinary Time whether we mark it or not. But to mark it with Havdalah can be fun, memorable and oh-so-kid-friendly (especially in the winter when sundown happens earlier in relation to bedtimes).
The traditional ceremony requires just a few props with accompanying blessings: a glass of wine/grape juice, a candle with more than one wick, and something that smells good. (See link below for how-tos.)
Today’s post concentrates on the “smells good” prop: the besamim, or spices/herbs. Anything fragrant and natural will do (not a dryer sheet, please, nor a Glade plug-in). Traditionally, we put spices in a little sachet, a besamim bag. The usual kind is easy, portable and durable: place a few whole cloves and broken cinnamon sticks in the middle of a tulle fabric circle, close with a rubber band and tie with a ribbon.* Kids love making these things, and they get good practical experience fiddling with the spices and the placement thereof, how to use a rubber band and how to cut and tie a ribbon.
But there are more spices than these two Havdalah staples. I bring a buffet of natural things for the kids to test in class: potted herbs, cedar sticks, an etrog, lemon or orange peel, pine needles, juniper berries, coffee beans, an etrog pomander, myrtle leaves from a lulav, plus the traditional cloves and cinnamon. (Do not assume kids know what the heck cloves and cinnamon are, by the way. Even some of my 3rd graders don’t.) Each student can select what smells best and make a personalized bag.

scratch ‘n’ sniff herb buffet
This year, we decided to grow our own besamim to harvest later for bags. Cloves and cinnamon won’t survive Nashville winters, so we are trying rosemary, two kinds of lavender, lemon balm, chocolate mint, sage, and in a separate pot (because it will take over), spearmint.
Suggestions for Fall planting:
Transplant established potted herbs now. The hardy ones (rosemary, lavender) will go dormant, the less hardy (mint family, including sage and lemon balm) will die back and emerge bushier in Spring.
If you cannot find small (or large) pots of herbs for sale at the moment, wait until stores start selling seed packets again and germinate seeds indoors for planting out in Spring. Each kid can start some of her own, in addition to what will stay at school. Or, do it the easy way: wait until Spring and buy small herb “starts.” Starts are very small pots and usually pretty cheap. Even my Trader Joe’s and local hardware store sell cheap herb starts in Spring.
A container garden can be so very simple. I tend to obsess over details, so read on if my obsessiveness aids your planning for home or school.
Materials: Tub, Placement, Drainage, Soil, Planting, Food, Worms, Mulch, Water
•Tub: Home Depot sells fake half-whisky barrels so lightweight I can lift an empty tub with one hand. 20 bucks. (Real whisky barrels are fabulous but also fabulously heavy.)
•Placement: Pick a site that receives 6 to 8 hours of sun per day, preferably with southern exposure. Look up to make sure a huge shade tree isn’t directly above your spot. Our tubs are beside the parking lot, so I use traffic cones to keep the area clear and give the kids safe room to work. Hopefully, you are near a water source. If not, you’ll have to do what I do (see Water below).
•Drainage: Drill at least six finger-size holes in the bottom for drainage. Set the tub onto a few bricks to keep it off the ground.
Have the kids throw a few pot shards or pebbles in the bottom to facilitate drainage.
•Soil: Buy a bag of organic potting soil (1.5 cubic feet each) for each tub and slice it open with a utility knife that the kids will never, ever see. Let students reach in with both hands and pull out gobs of soil. Throw into pot. You might have to demonstrate how, because some kids do not like dirty hands. When they see that the nice, dry potting soil isn’t sticky, they’ll probably dive right into the bag. Do not be tempted to upend the entire bag and dump it, because the whole point of this activity is to let the kids do all the work.
•Planting: Stop filling when your soil gets to within about 6 to 8 inches from the top. Make depressions in soil that approximate how deep your potted plants are.
To pop the plants out of their pots, show kids how to slide fingers between the stem, turn over the pot, and gently pry off the pot. If the roots look crazy matted and overgrown (root-bound), gently loosen the roots so they can stretch out in their new home.
Backfill the soil around each plant to its original soil depth. Kids will probably end up with each plant at a different level, so you’ll have to gently raise the low ones to meet the highest.
•Water. Remember to water during dry spells. Part of the beauty of a Fall garden is that you might not have to do much watering at all. Our kids take turns carrying a full bucket with cups in it, then everyone scoops water with a cup.
Extras for kids: Eggshells, Worms, Mulch, Art, Nature Bonus
•Eggshells: Crush empty, dry eggshells into smithereens and incorporate into top layer of soil without disturbing new roots. Kids can smash a ziploc filled with eggshells, or you can spread newspaper on the ground and let kids hit the shells with flat rocks. They love this. Eggshells release minerals into the soil and are a favorite snack of nesting songbirds (females repurpose the calcium into new eggshells) and of worms.
•Worms: Kids can dig nearby for worms and add to the tub, or you can show up for class with a jar full from your own yard. Explain how worms keep the soil and plants healthy by tunneling and eating and pooping (worm castings). DO NOT ADD WORMS IF YOU USE POTTING SOIL THAT IS NOT ORGANIC. Some folks say “Miracle-Gro” kills worms. At the very least, artificial fertilizers do not help soil get or stay healthy. This is a great opportunity to talk about such things with kids.
•Mulch: It’s Fall-time, so have the kids scramble around the area for leaves on the ground. Crumble them up and add to the top of the soil. This feeds the soil and helps it retain moisture. Feel free to add proper mulch on top of the leaves, should you have access to a fresh supply.
•Art: Students can craft signs for each plant in English and Hebrew, and a sign for the tub itself. We’re naming our tubs Gan Mitzvot (garden of mitzvot) because we plan to enlarge the scope of planting beyond Havdalah. Parsley and Horseradish, for example, for Passover. (Horseradish must have its own container! See my post about repurposing leftover Maror after the seder.)
•Nature Bonus: These herbs will flower in due time, and when they do, your Havdalah Garden will attract native pollinators galore: bees, butterflies and other creatures more homely yet just as crucial. Even hummingbirds love many herb blossoms. Meanwhile, leaves will host caterpillars and attract insectivorous songbirds and beneficial insects. This leads directly to my posts about how to turn your own yard or your school into Certified Backyard Habitat with the National Wildlife Federation.
Stay tuned for more posts about Havdalah. One of my jobs at our synagogue is to help kids create their own versions of the ritual items to personalize the service, to beautify the mitzvah, and to give them hands-on concrete reference points. The 2nd and 3rd graders then go on to lead the whole congregation in a big ol’ group Havdalah. It’s awesome (except for the parts where I freak out that someone’s hair will catch fire. Multi-wicked candles burn HIGH).
*Tulle circles for besamim bags are sold in the wedding favors aisle at craft stores. I like to use circles rather than the tiny drawstring bags because the circles make kids work a lot harder. Watching a student figure out how to loop a rubber band to shut a bag is one of the highlights of my year. Seriously.
LINKS:
•Havdalah page at MyJewishLearning.com with whys and how-tos (by Rabbi Susan Silverman).
•My Recyle an etrog as besamim post.
•Shalom Shabbat: A Board Book for Havdalah by Susan R. Topek, illustrated by Shelly S. Ephraim approaches the Havdalah via the 5 senses.
•FANTASTIC online pdf reference for gardening Jewishly with children of all ages: Jewish Children’s Garden Curriculum by the staff of Shalom Children’s Center and the Asheville Jewish Community Center.


Pingback: Havdalah Besamim Activities | Bible Belt Balabusta