

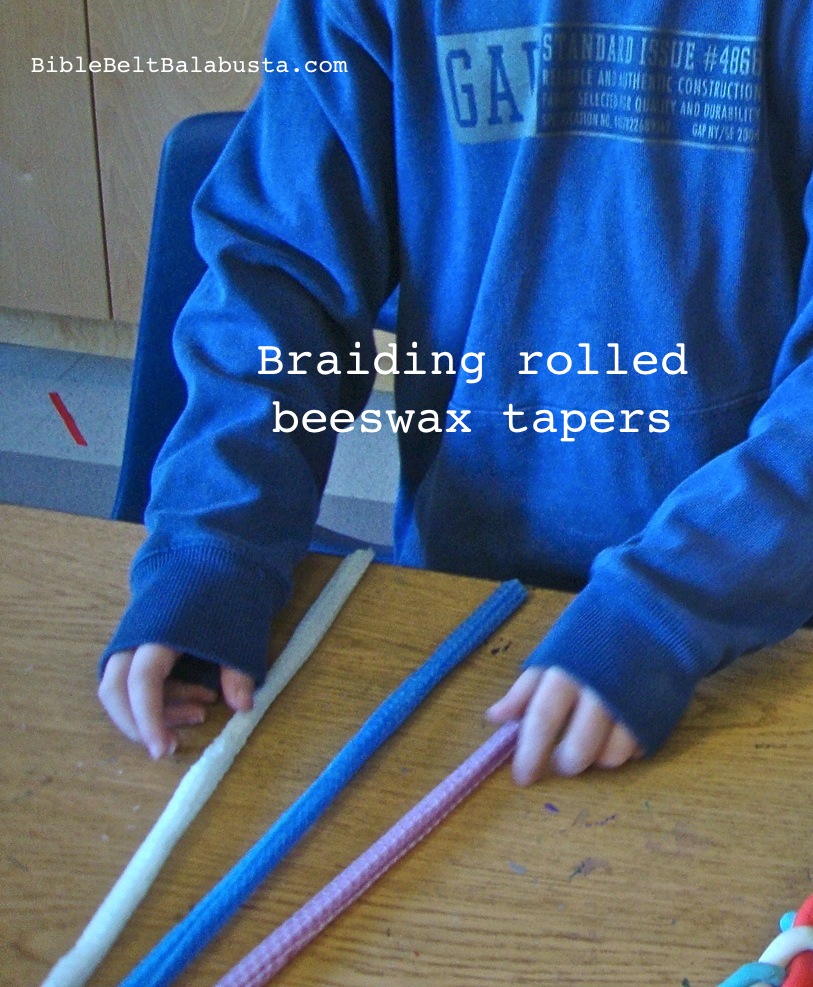
rolled beeswax sheets, twisted or braided by students
My Making Havdalah Candles with Kids Intro has the general whats and whys. I’ve also got posts about how to dip beeswax Havdalah candles and how to repurpose cruddy Hanukkah candles for Havdalah.
To roll Havdalah candles out of beeswax sheets is a zillion times easier than to dip tapers. Especially if you’ve procured soft sheets of wax: sheets that are pliable, supple, biddable. The good wax.
HOW:
Lets assume you’ve found the good wax, along with square braided cotton wicks about an inch longer than the sheets.
Decide: do you want thin, tall tapers to twist or braid together, or do you want one, thick, tall candle rolled with multiple wicks inside? Try making one of each before you program one or the other with kids. Instructions for thin tapers to twist / braid start with…
•For THIN TAPERS TO TWIST or BRAID:
1. Each separate taper starts off as a sheet with a width of 1.5″ to 2″ and a length of anywhere from 8″ to 16″ long. You decide how long, given the original size of the sheet. Remember, when you braid or even just twist tapers, the total candle length will shorten. (See Tips below for advice about length.) Trim a big sheet of beeswax with a ruler as straight edge and a knife.

easier to do than it sounds
2. Make a ledge to accept the wick by pressing the long edge of wax 1/4″ over the edge of a table. Flip sheet over, and now the 1/4″ is sticking straight up. Position a wick along this long edge, with up to 1/2″ hanging out both ends. Why both ends? Because one end will invariably be prettier than the other, which you can then orient as the “top.” (Later, you’ll trim the excess wick off the uglier “bottom.”)
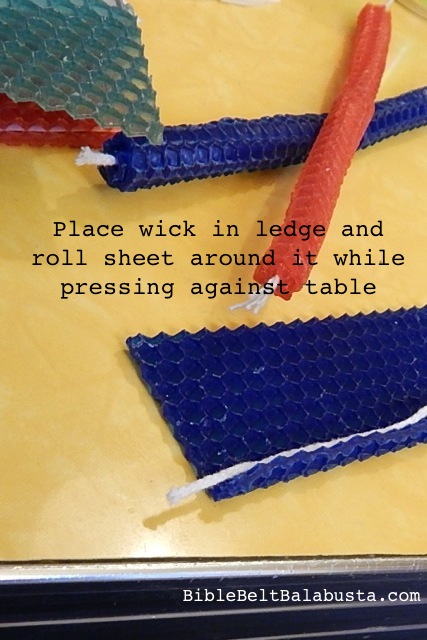
3. Start pressing the wax around the wick, rolling as you go. Keep it tight. Press the candle down on the table surface as you roll, and press up and down the length of the taper to make sure the thickness is uniform. When you get to the end of the sheet, gently press the edge into the taper to seal. Roll three separate tapers.
4. Line up the tapers. Gently press the bottom ends together on a table—which anchors them—and braid (or twist, if using only two).
Do your students know how to braid? If not, they can practice with playdough, pipe cleaners or Twizzlers. Braiding is easier to learn if the pieces are different colors: “put the white over the blue, the red over the white, etc.”
Or, they can simply twist two tapers together. Two wicks still equal one kosher candle. (See Intro post.)
•For ONE TAPER with 3 WICKS OPTION (PILLAR):
Use a wider width of wax (say that three times fast!) and roll a chunkier candle using three wicks inside. Figure on a sheet of at least 6″ wide and however long (at least 6″). Start with the one wick as described above, but as you keep rolling, add another wick, and then, after a few more rolls, a third wick. Try to stagger their introduction so the finished candle has all three wicks somewhat near the center (rather than way out toward the edge).
This makes a “pillar Havdalah candle” that you didn’t have to mess with melted wax to get.
Decorate the big pillar:
1. Cut small shapes of the beeswax (contrasting colors) to press against the sides.
2. Stand pillar on a paper plate and let a child hold a lit hanukkah candle and drip colored wax down the sides. Once a kid starts dripping wax, forget about doing anything else that day.
Another pillar option is to use triangles of wax, which creates a “tapered” shape. See the DIY link under Tips, below.
Again, this is assuming you’ve found the good wax.
Bad wax is dry and brittle. Bad wax breaks instead of bends. Bad wax will make your students hate making a candle. There is but one sane thing to do with such sheets: cram them into a tall can and melt them down for dipped tapers.
Theoretically, there are ways to soften bad wax. I’ve tried them all (listed below). Better to find the good wax to begin with and avoid all the mishugas.
Where is the good wax, you ask? If you know, tell me. Leave a comment so we can all know.
I’ve found one kind of good wax, so far. Its in the HearthSong catalog of toys and crafts. The “Winter” candle-making kits include a dozen blue, purple and white 8″ squares for $21.95. The yield for Havdalah candles will vary depending on the size and number of tapers. For example, if I cut each 8″ square into 4 strips, I can get 48 tapers. This makes 16 Havdalah candles with three tapers each, or 24 Havdalah candles with two twisted tapers each.
HearthSong wax is so pliable, even preschoolers can manipulate it without frustration. This is the type of wax that can also be used as candle decoration: trimmed with scissors or shaped by tiny cookie / canape cutters and simply pressed onto another candle. It sticks, but isn’t sticky.
Amazon hosts lots of other vendors who sell beeswax sheets. (Don’t buy beeswax “modeling” sheets for candle-making.) I advise reading reviews very carefully before ordering, and perhaps even contacting the seller for assurance about wax pliability.
Two Jewish education vendors sells sheets for making multiple Havdalah candles: Torah Aura and KosherKrafts. I ordered the KosherKrafts kit, which came packaged carefully and with lots of wicking, but the wax itself was not soft enough to use without taking extreme measures. I realize wax is a natural product with natural variations and can be affected by age, quality, composition and, moment by moment, just by the temperature of the room. KosherKrafts wax in a hot room was do-able, but in my chilly synagogue art rooms, I had fits to try to get it soft enough to work.
Which brings me to the Kafkasque portion of my wax adventures. Here are the warming methods we tried, with ever-increasing frustration, to turn the bad wax into good. The results are in parentheses. You will see why I advised just chucking it into a melting can instead:
1) I brought two space heaters from home to raise the room temperature. (They tripped the classroom’s circuit breakers and we had no electricity the entire class.)
2) I breathed on a sheet and encouraged the students to do the same, but they didn’t know how. I had to teach them how to manipulate their own breath to be hot or cold, as needed. (Didn’t work anyway.)
3) We held them in our hot hands. (This was ludicrous.)
4) We steamed them with a teakettle. (We got scorched.)
5) We laid them on a blech: a marvelous yiddish term for “tin,” but it really means “electric warming tray.” (They melted. Even when we covered the blech with towels. Blech. Blech. What a great word. Try saying it a few times.)
6) We put a microwaved bed-buddy in the storage box with the wax sheets. (They melted.)
7) We submerged them in a sink of hot water. (This worked, but by the time the kid dried it off and carried it back to the desk, the wax was brittle again.)
8) We blew each sheet with an ancient hair dryer. (This worked, but could only spot-heat one kid’s wax at a time. And golly, was it loud.) A blow dryer can totally save your bad wax if you are at home with just a kid or two, but trying to race around a classroom to spot-heat wax sheets of multiple students at once is insane, even with a 25 foot extension cord.
I feel sure that if my classroom had been, say, uncomfortably warm, the wax would have worked fine. So, the moral of my story is: make rolled beeswax candles in a warm room.
TIPS :
Length: 16″ tapers are too long for young children to make and use. Even if a student is able to make it, that length is tricky to just carry around without having it whack against something and crack. I’ve had better luck with 8″.
Blow Dryer: Even Martha Stewart uses a hair dryer to warm sheets of beeswax at crucial junctures: when starting the wick and sealing the final edge. To use a blow dryer is so easy at home and so difficult at school when you’ve got 13 kids who need hot air simultaneously.
Buying wick: If you didn’t get a kit, you’ll need to buy wick separately. For any beeswax candle, buy square cotton wicking. You’ll need to do the math to figure how much to get based on the length of each taper, plus an inch.
Trimming wick: Trim each wick to about 1/4″ before lighting.
Beeswax Hanukkah candle kit: FYI, I had wonderful luck with Rite Lite’s Make Your Own Chanukah Candles kit. The little sheets and wicks are sized for 4″ tall Hanukkah candles, and the wax is definitely the good wax. I can’t promise your kit will be as marvy as mine because many retailers sell it, and you’d never know how old a particular box might be. On a whim, I combined two 4″ sheets lengthwise and made 8″ Havdalah tapers. The wicks had to be overlapped to achieve the right length, which may be a disaster once we burn the candles halfway down. We’ll see…
“Tapered” pillar beeswax sheet havdalah candles: Chadis Crafts has a tutorial here.
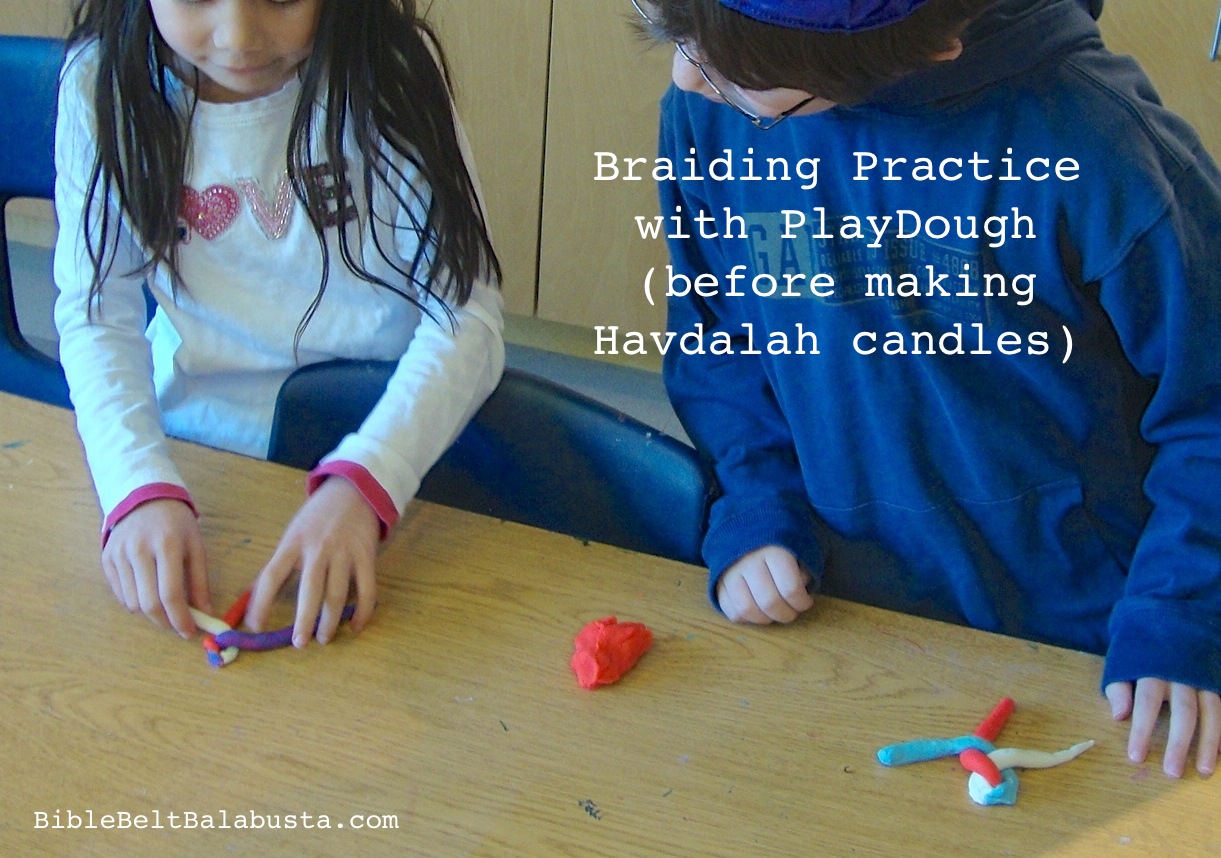
or use Twizzlers or pipe cleaners


Pingback: Mini Havdalah candle (twisted Hanukkah candles) | Bible Belt Balabusta
Pingback: Making Dipped Beeswax Tapers for Havdalah | Bible Belt Balabusta
Pingback: Making Havdalah Candles with kids | Bible Belt Balabusta
Pingback: Havdalah Besamim Activities | Bible Belt Balabusta